Maverick Render 2026.1 - Cutaway
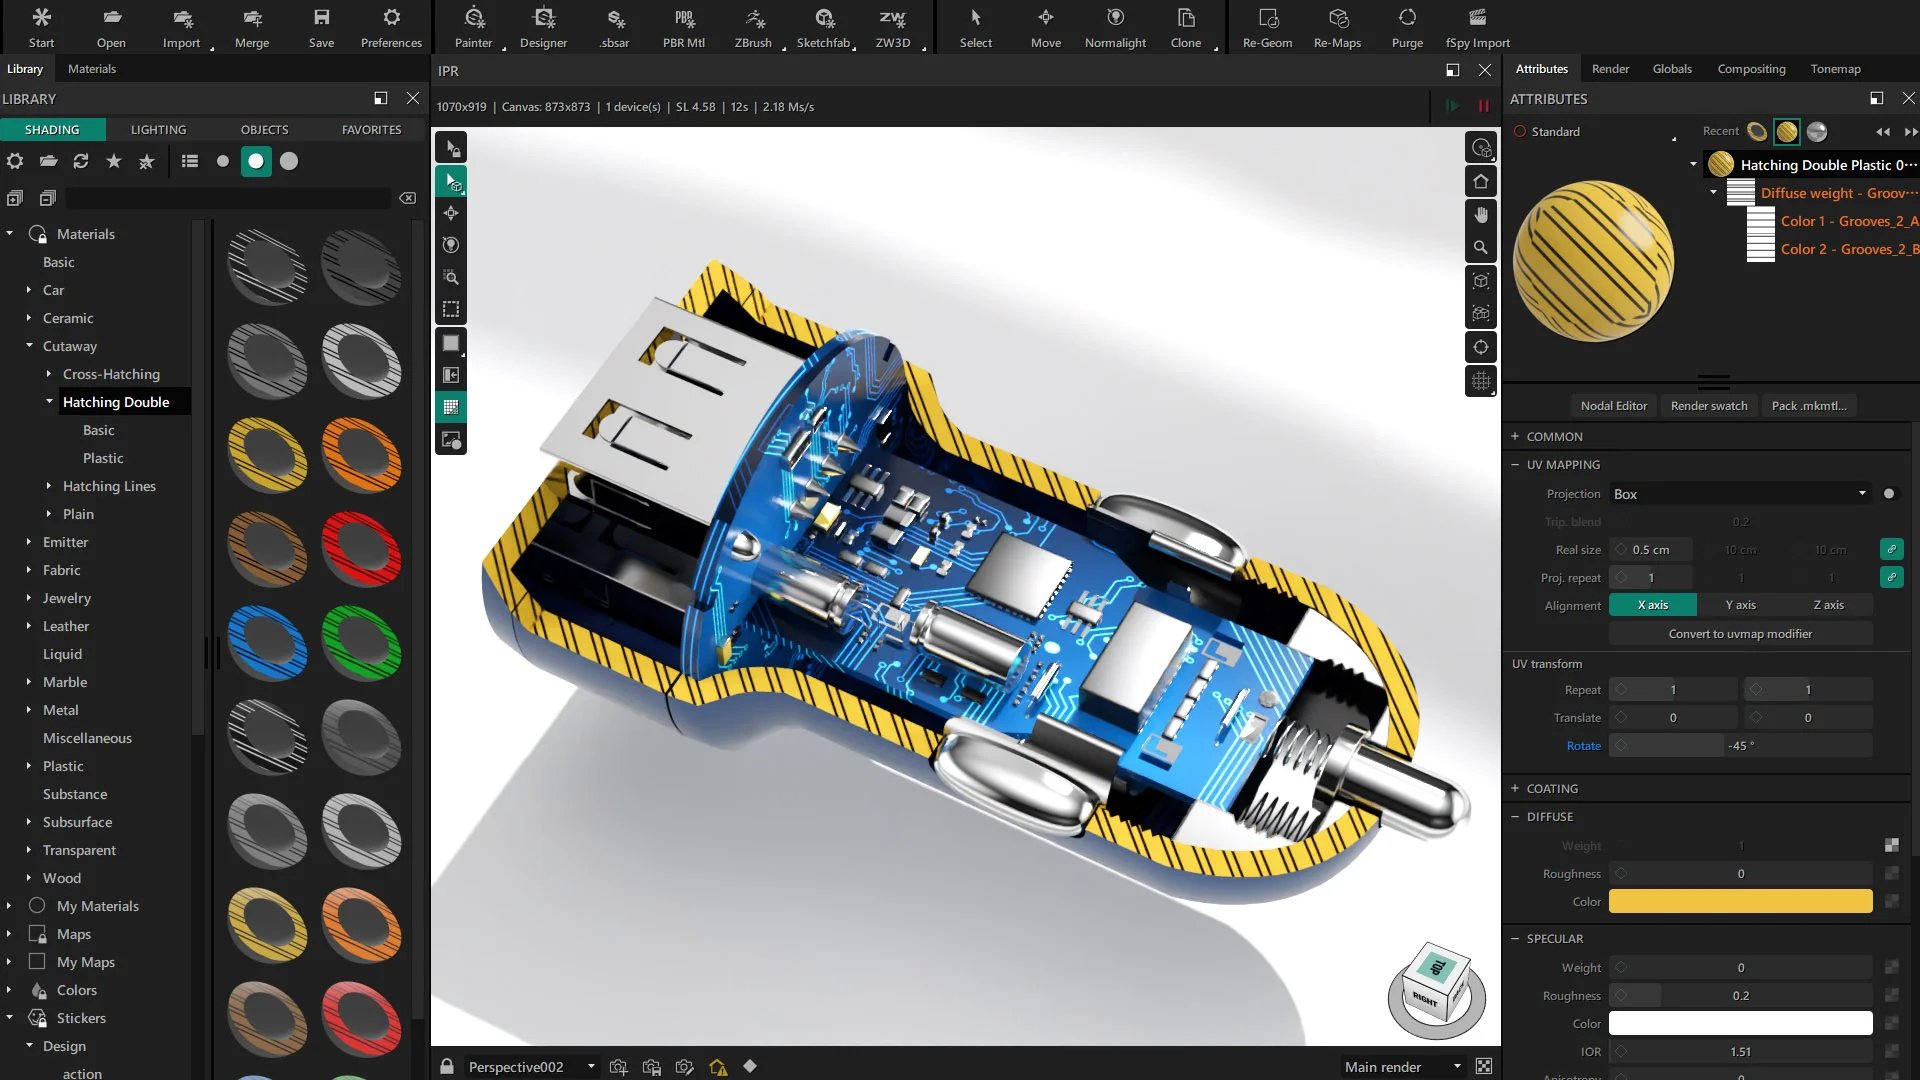
The art of revealing the invisible.
In the world of product visualization and industrial design, communicating the internal complexity of a design without sacrificing its outer shape is a major challenge. Showcasing the intricate wiring of a motor or the exact layout of a charger usually requires tedious modeling workarounds or visibility tricks that disrupt your workflow.
With the release of Maverick Render 2026.1, we are thrilled to introduce a solution that transforms technical rendering into cinematic dissection: the Cutaway feature.
This is not a simple boolean cut. Its greatest strength lies in non-destructive exploration. The Cutaway tool allows you to dynamically slice through complex CAD models in real-time, keeping your original engineering geometry completely intact while revealing the inner workings with absolute technical precision.
The workflow revolves around the specialized Cutaway Material. By assigning this material to a primitive object, or your own imported cutter geometry, it becomes a dynamic intersection tool. Any translation, rotation, or scaling of the cutter updates the cross-section instantly in the viewport. Furthermore, to achieve professional results in heavily populated scenes, Maverick gives you full control over selectivity, allowing you to dictate exactly which components get sliced and which remain intact to provide context.
To help you master this new tool, we have put together a comprehensive 4-part video series. Let's dive into what you can do with Cutaways in Maverick 2026.1!
The Basics: Slicing 3D Models Made Easy
The Cutaway tool is designed to be incredibly intuitive. By simply dropping a primitive object into your scene and applying one of our new Cutaway Materials, you can instantly slice through your geometry.
In our introductory tutorial, we explore the core mechanics of the tool:
- Real-time slicing: Watch your cross-sections update dynamically in the IPR as you move the cutting primitive.
- Material Library: Access a comprehensive library of hatching patterns and solid colors specifically designed for cut surfaces.
- Trace Sets: Learn how to use inclusion and exclusion IDs to protect specific objects from being cut.
Watch the full tutorial:
Animating Moving Parts: DC Motor
Static cross-sections are great, but animated ones are spectacular. In our second example, we take a detailed DC Motor and bring it to life.
This tutorial focuses on creating a sliding slice effect while simultaneously animating the internal mechanics of the product. You will learn how to:
- Scale and customize double-hatching materials for smaller mechanical parts.
- Exclude critical internal components (like the rotor and fan) from the cut using Trace Sets.
- Use Transform Motion Controllers to animate the rotation of internal parts as the outer shell is sliced away.
Watch the full tutorial:
Angled Cuts & Dynamic Lighting: Power Strip
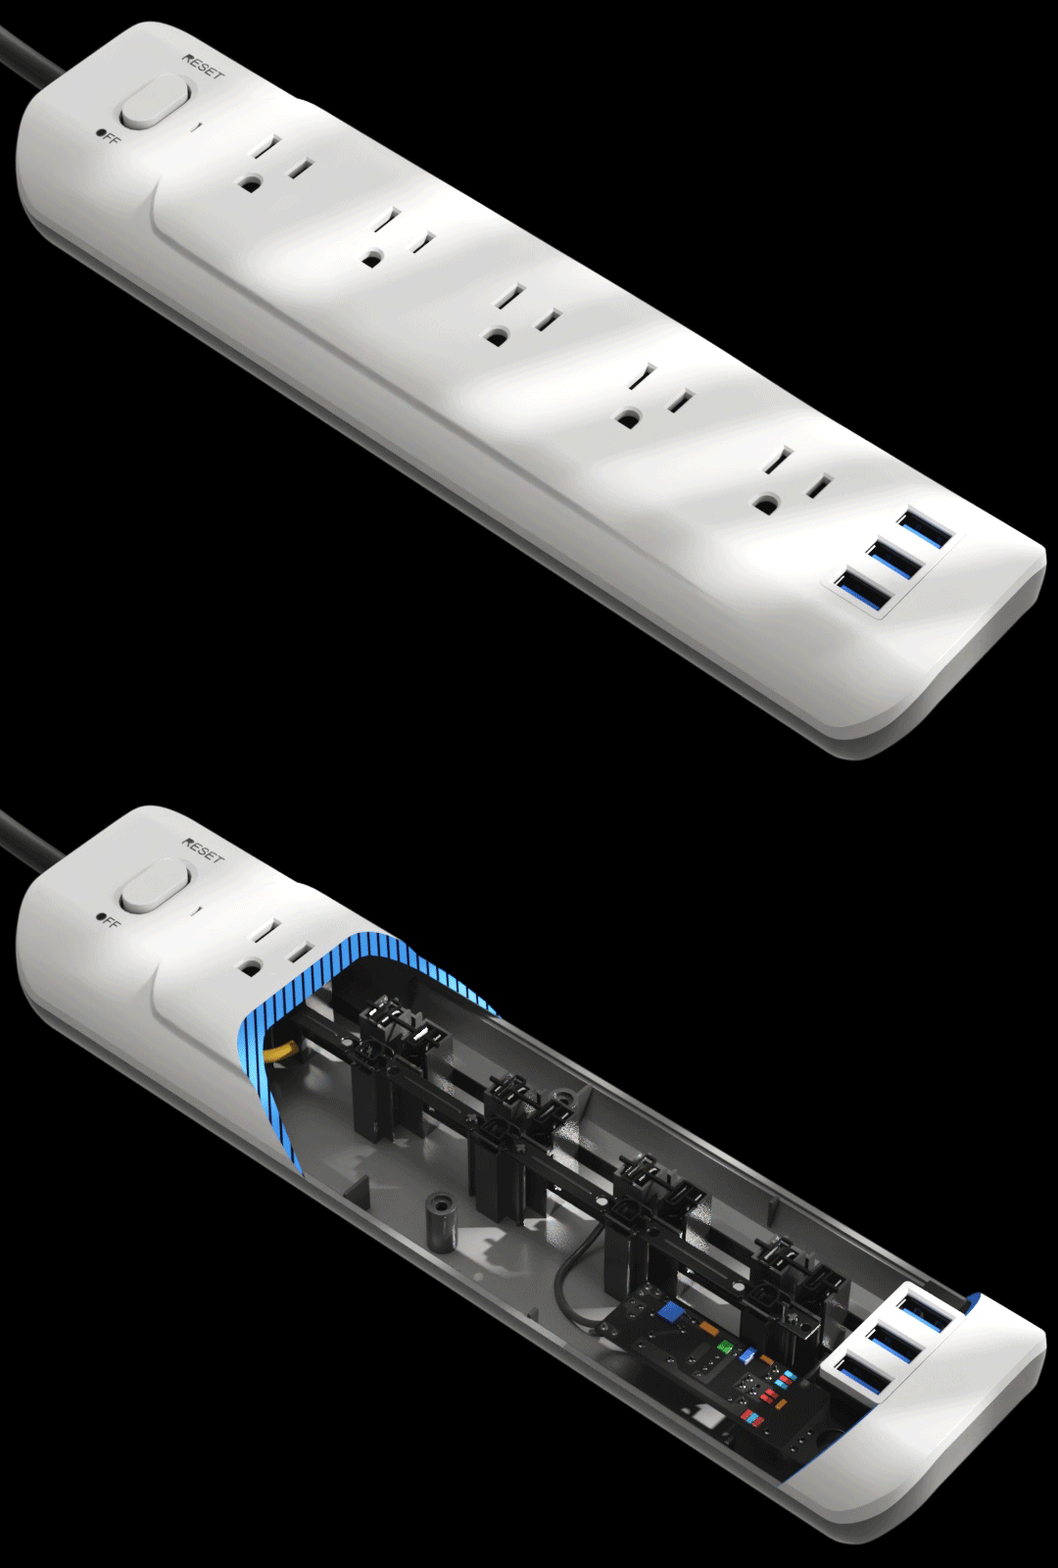
Sometimes a straight vertical or horizontal cut isn't enough to showcase your design. In the third video, we tackle an angled cutaway using a power strip socket.
This video also emphasizes the importance of lighting when doing cross-sections, ensuring the interior cavities are properly illuminated. Highlights include:
- Negative Trace Sets: A clever trick to force the cutaway effect onto a single, specific object while ignoring the rest of the scene.
- Angled Slices: Rotating the cutting primitive for precise, 60-degree cross-sections.
- Dynamic Lighting: Using Hard Spotlights, Projectors, and Top Gradients to add depth and realism to the exposed interior.
Watch the full tutorial:
Assemblies & Looping Animations: Car USB Charger
Combining everything we've learned in the previous videos, our final Cutaway masterclass levels up the complexity using a car USB charger mechanism. We focus on slicing only the exterior shell while creating a seamless, looping presentation.
If you want to create highly polished, continuous product animations for your portfolio or clients, this is the workflow for you:
- Cloning & Assemblies: We will use Maverick's native primitives, grouping and combining them to build the exact shape we need for the cut, in this case, a perfect 45-degree angled wedge slice. While building assemblies inside Maverick is quick, keep in mind that for highly complex shapes, it might be more convenient to simply model custom cutting objects in your favorite 3D application and import them into your scene.
- Ping-Pong Easing: Set up a reversing "Ease Out" animation loop so the outer shell seamlessly slides away to reveal the interior, and then smoothly returns to its original closed state.
Watch the full tutorial:
Ready to slice your own models?
The Cutaway tool in Maverick Render 2026.1 completely changes the game for technical product visualization. Whether you need a quick static section plane or a fully rigged mechanical animation, achieving photorealistic cross-sections has never been faster. Update to Maverick 2026.1 today or download our free trial to start exploring the inside of your designs.
--
As always, thanks for watching!