Maverick Studio is a GPU-accelerated desktop app where our proprietary simulator of the physics of light is harnessed with intuitive and interactive drag-and-drop tools.
Import your 3D models or CAD data files, and render amazing photo-real shots or turntable presentations with the best quality and the least effort imaginable.
A bridge plug-in for Rhinoceros is also available.
Rhino-to-Maverick Connection
With our brand new Rhino plug-in you can Send (and Update) your models to Maverick Studio with a single click, preserving the materials, lights, and camera work done in Maverick.

User-friendly workflow
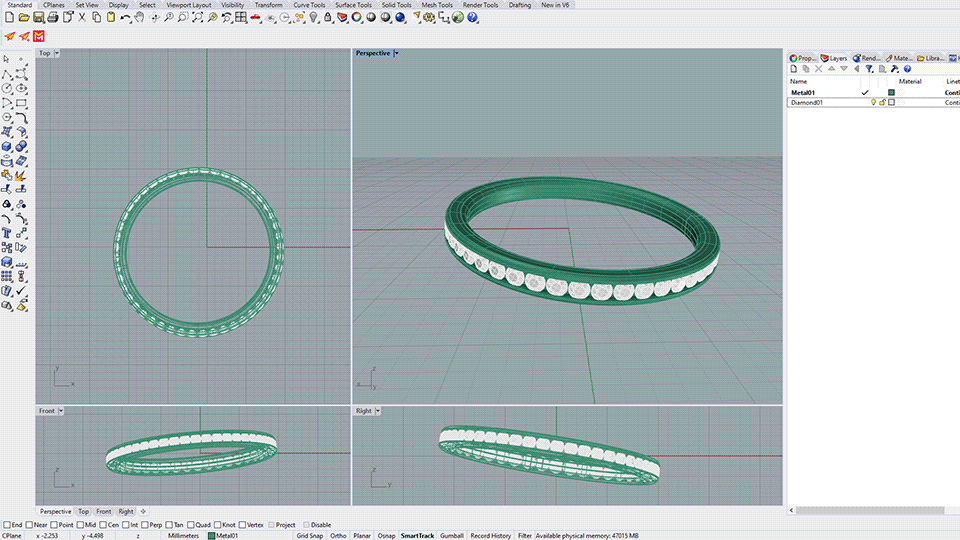
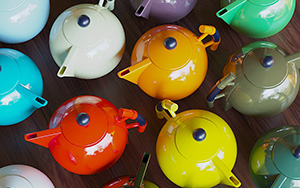
Enjoy our comfortable and user-friendly workflow to illuminate your jewelry models and achieve photo-real results thanks to our gradient lights and our physically-correct materials.
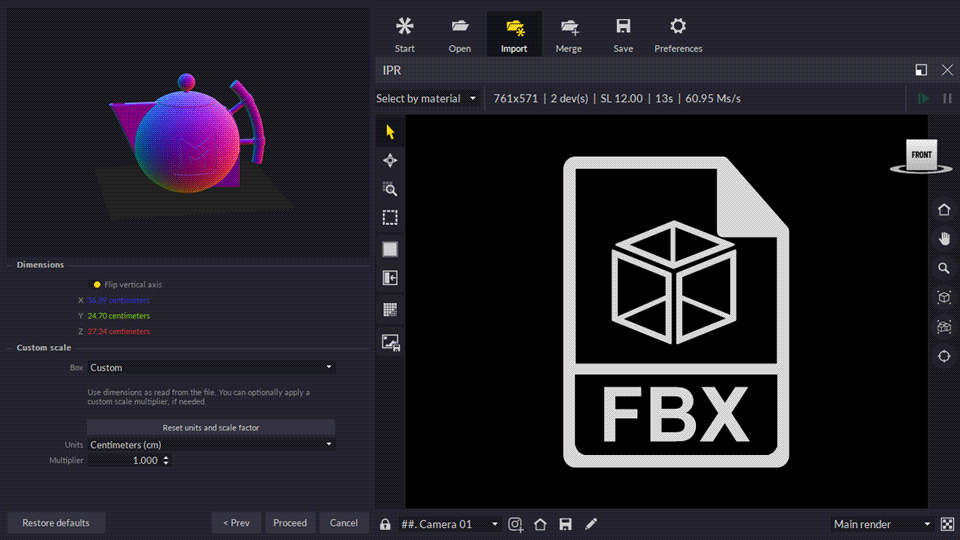
3D Model Importers
Not a Rhino user? Export from your modeling software to any of the many file formats that Maverick can import natively and enjoy dressing your geometry with materials and lighting to achieve photo-real shots effortlessly.
Drag and Drop
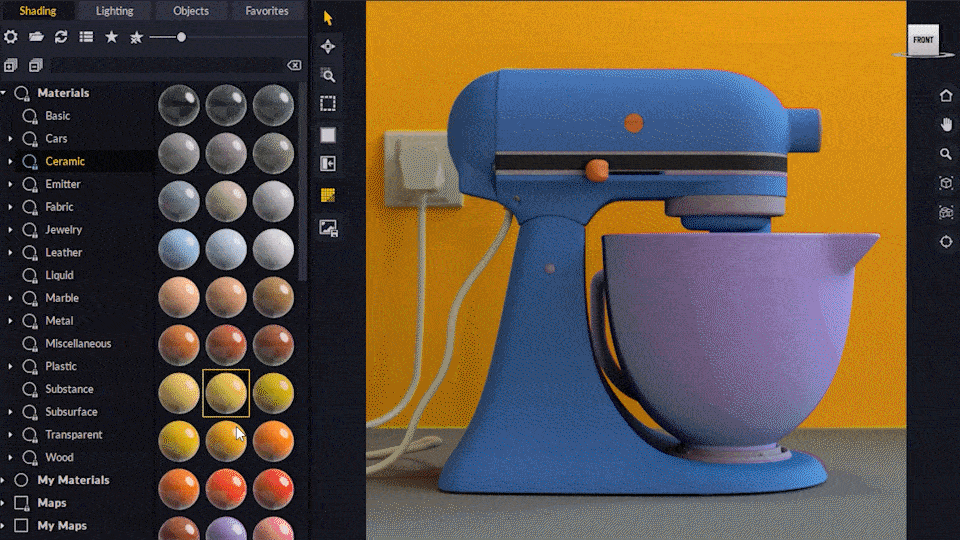
Maverick's ease of use truly shines when it comes to its drag-and-drop capabilities. Dressing your scene is as simple as dropping materials from our library with 2K+ carefully-crafted productviz materials.
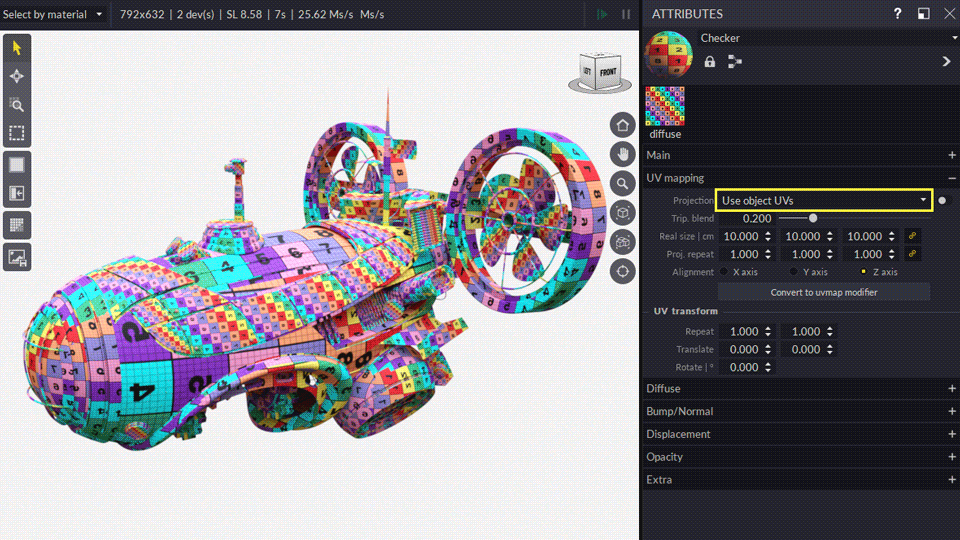
UV Maps
Avoid bad-looking seams and time-wasting UV-mapping altogether thanks to our built-in material uvmap system. Select triplanar projection to dissolve the seams, and then adjust the material scale simply by entering its real-world units.
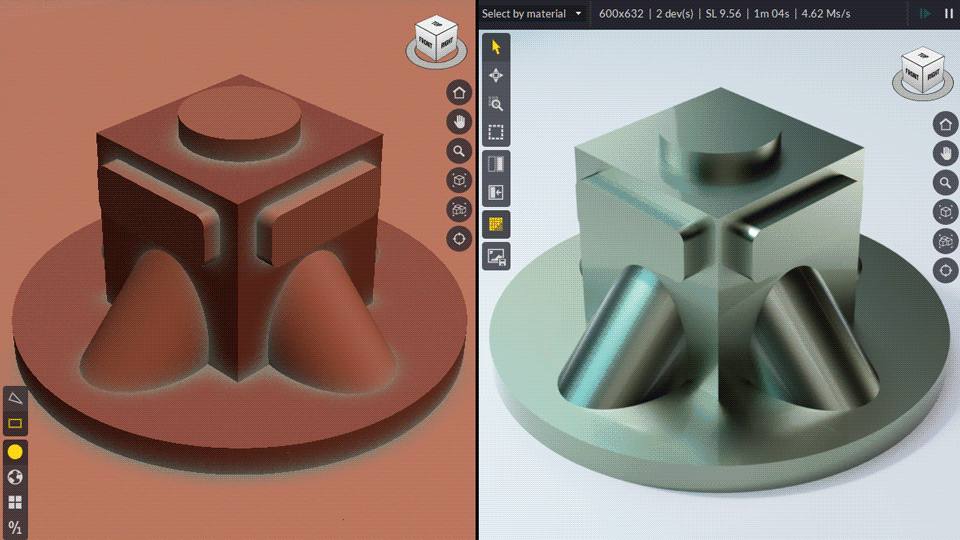
Round Edges
Modeling small bevels on your models is always a complicated task. Thanks to our incredible round edges solution, you will be able to round off any edge and automatically boost the realism of your images with no hassle.
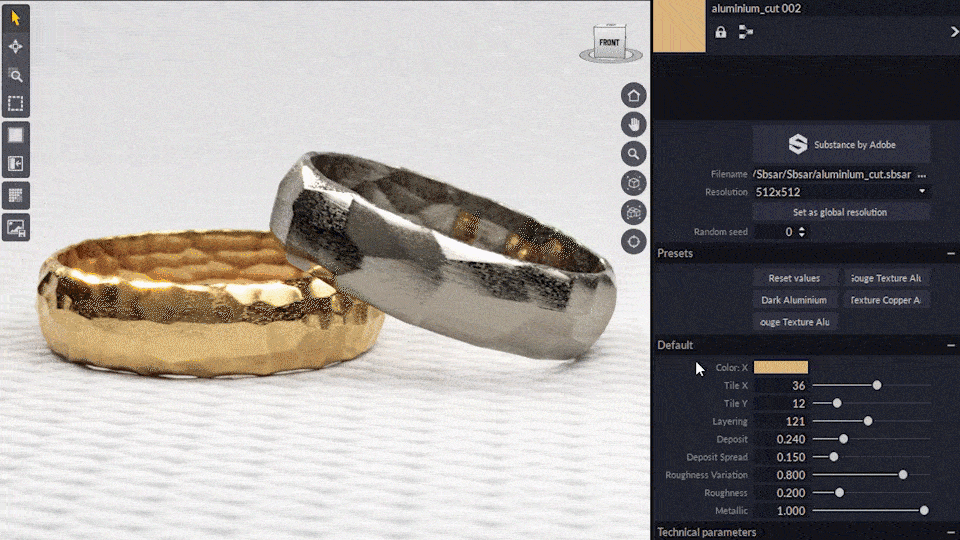
SBSAR Materials
Maverick natively supports Adobe's proprietary Substance SBSAR technology, which gives you access to a vast selection of ultra-realistic and easy-to-configure parametric materials.
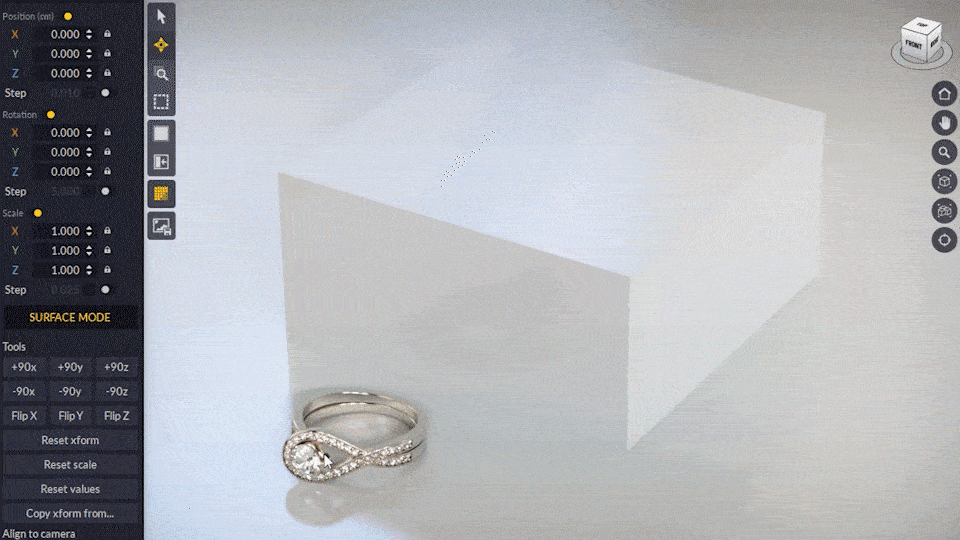
Surface Mode
Easily place contacting objects with the surface mode in our move tool. Objects will follow the shape of the base object.
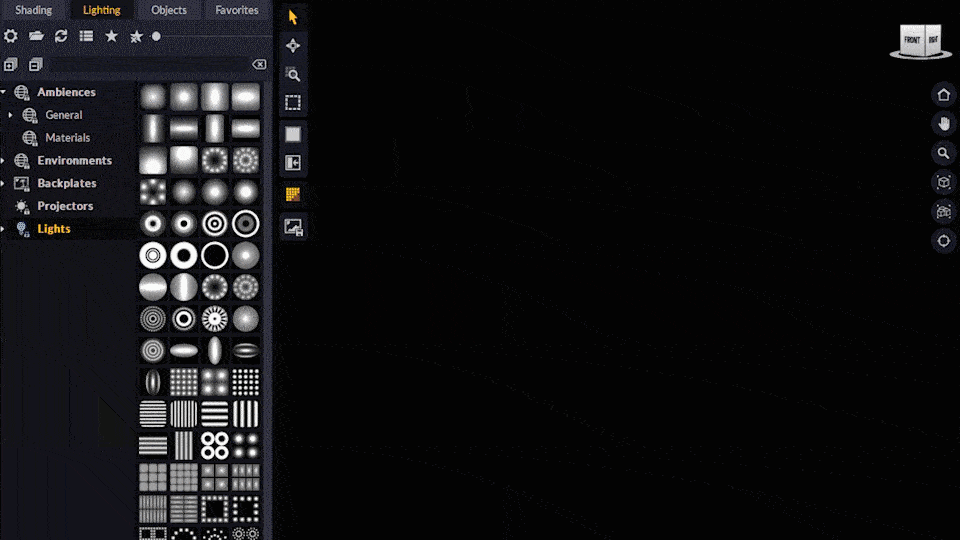
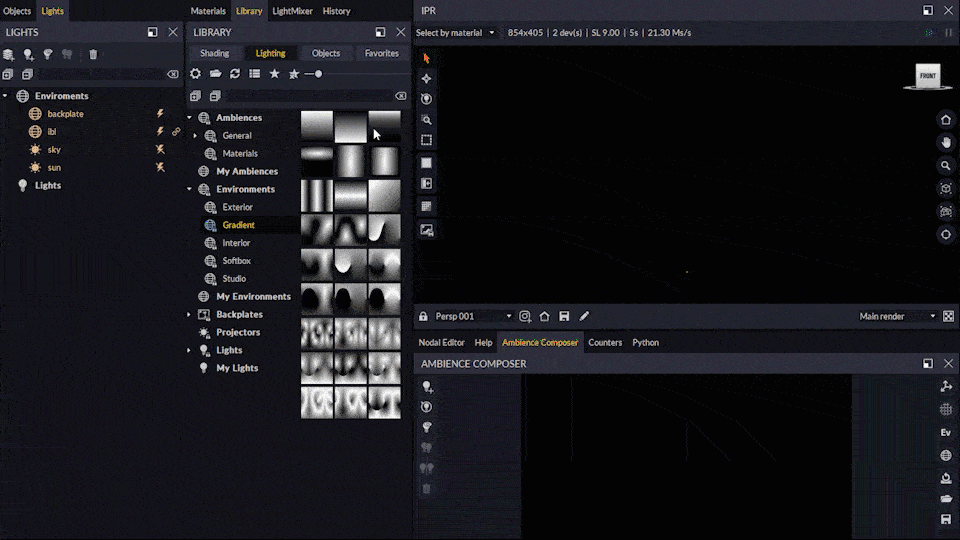
Ambiences
With our library of ambiences you can easily change the mood of your scene by simply dropping lighting setups we have carefully crafted for product visualization.

Shadow Catcher
With our Shadow Catcher solution you can seamlessly integrate your 3D objects on pre-existing photos or backplates. Our lights even have the ability to illuminate the backplate so you can make perfect photo compositions.

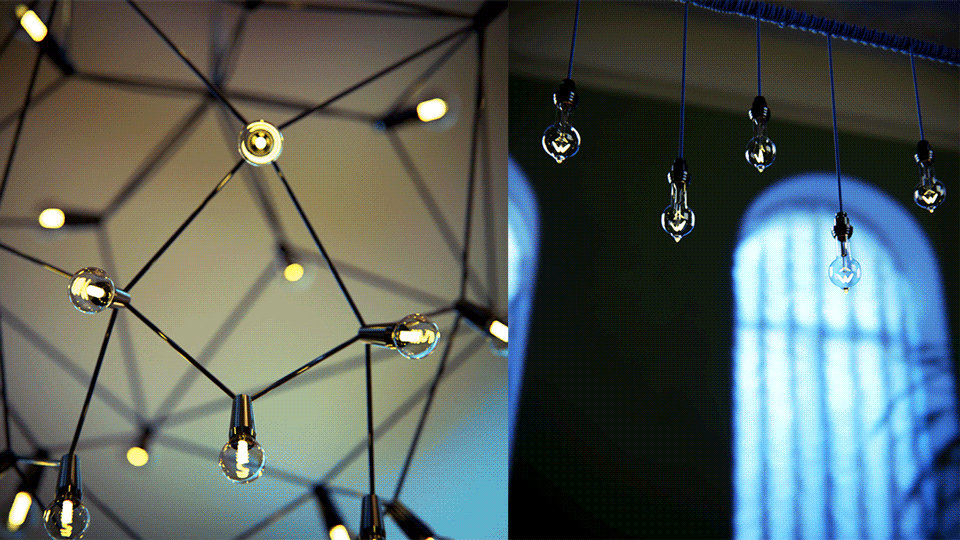
Gradient Lights
A main protagonist in Maverick: Gradient Lights is a powerful system for parametric lights that simulate real illuminants that will give your images an amazing realism boost. Enjoy our library with more than 100 ready-to-use presets.
Normalight
Gradient Lights, just like any other light created in Maverick can be easily positioned around your objects thanks to our Normalight technology. This tool allows you to create professional lighting setups with precision in no time.

Ambience Composer
Manipulate physical lights easily in our new intuitive panoramic panel. No HDR painting involved. The Ambience Composer is an orbital positioning tool that deals with real geometry lights, with all their inherent benefits over Image-Based Lighting.
Ambience Composer Save and Reuse
Undoubtedly one of the features most sought-after by our users. Now you will be able to save your own ambiences to the library and reuse them in any scene within Maverick Studio.

Lightbox
Lightbox is a new type of node meant to be connected to the IBL which creates a fully parametric virtual room. This node can be used to quickly create a room-like or lightbox-like (a.k.a., softbox) environment. This can be extremely useful not only to ground your object in plausible neutral surroundings, but also to cancel distracting unwanted reflections from your objects.

Trace Sets
Trace Sets allow you to selectively control which objects and lights in the scene are allowed to interact with each other.
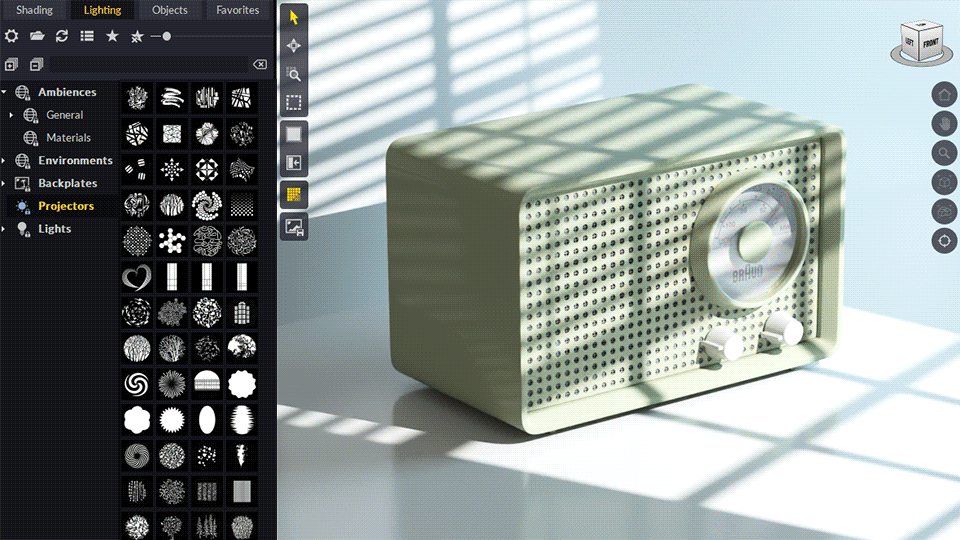
Projectors
Creating theatrical and moody lighting has never been easier than with Maverick. With our Projector Lights you will be able to simulate complex shapes that will bathe your objects, creating unique atmospheres.
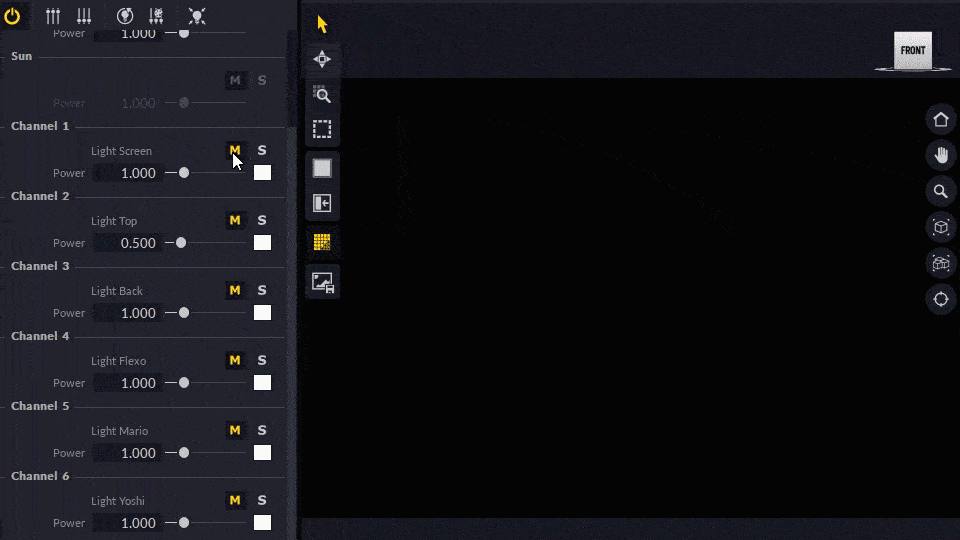
LightMixer
Change your lighting on the fly. Turn lights on and off. Modify their intensity and colors. All this without having to render again! You will save tons of working hours with the ability to make instant adjustments from our LightMixer panel.
Glare and Bloom
Our acclaimed glare and bloom system performs a physically-correct simulation of the camera lens and achieves spectacular results, far from the cheap-looking blur-based approximations used by other software packages.
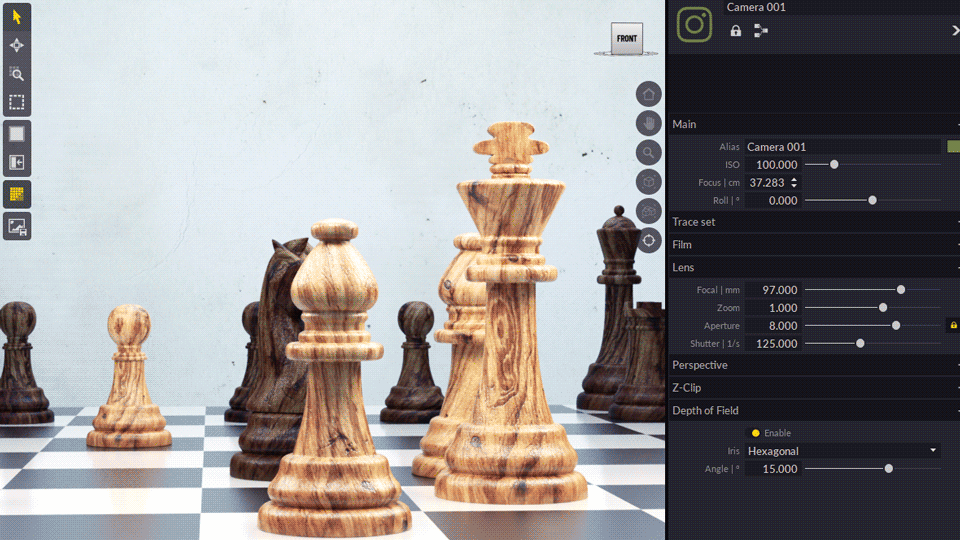
Depth of Field
Depth of Field is essential to make your renders look like photographs. In Maverick you can set up your camera to simulate a real-life camera. With our DOF tool you can easily pre-visualize which areas of the image are in focus and which are not.
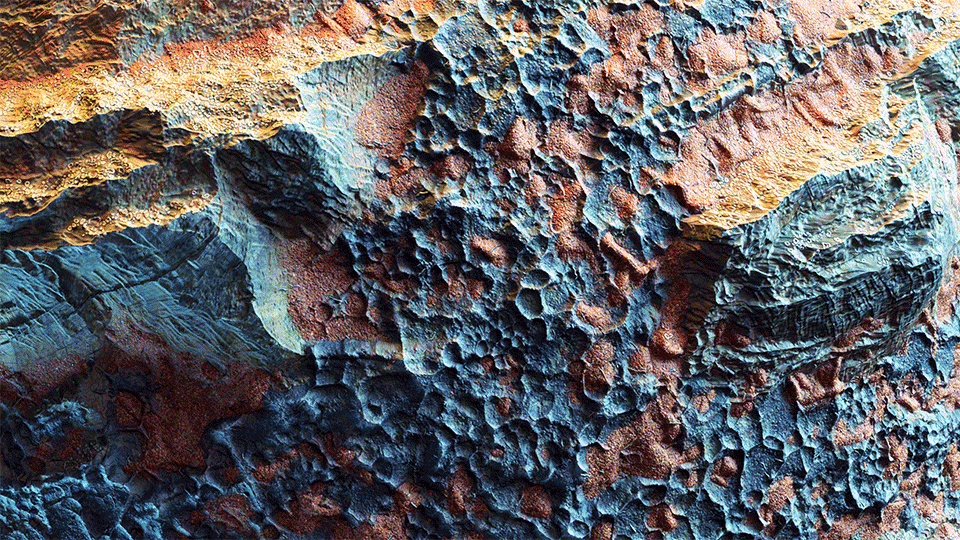
Displacement
The quality of our displacement is second to none. Get extraordinary details in your materials thanks to our displacement + autobump solution, which will allow you to adjust surface micro details to the extreme.
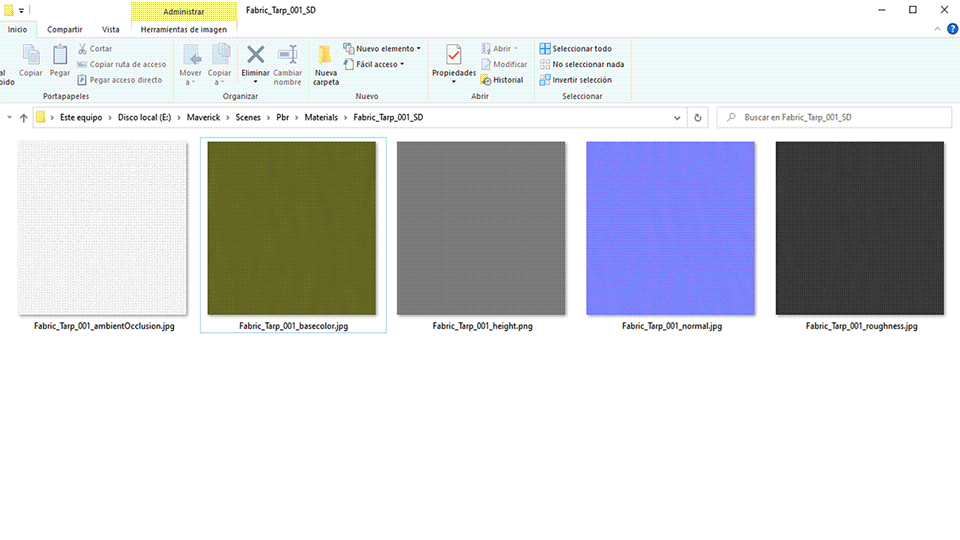
One-click PBR textures import
Import PBR textures smartly into Maverick with our one-click file picker. Simply pick one of the material textures and Maverick will auto-detect and pull the rest of textures to rebuild the full material.
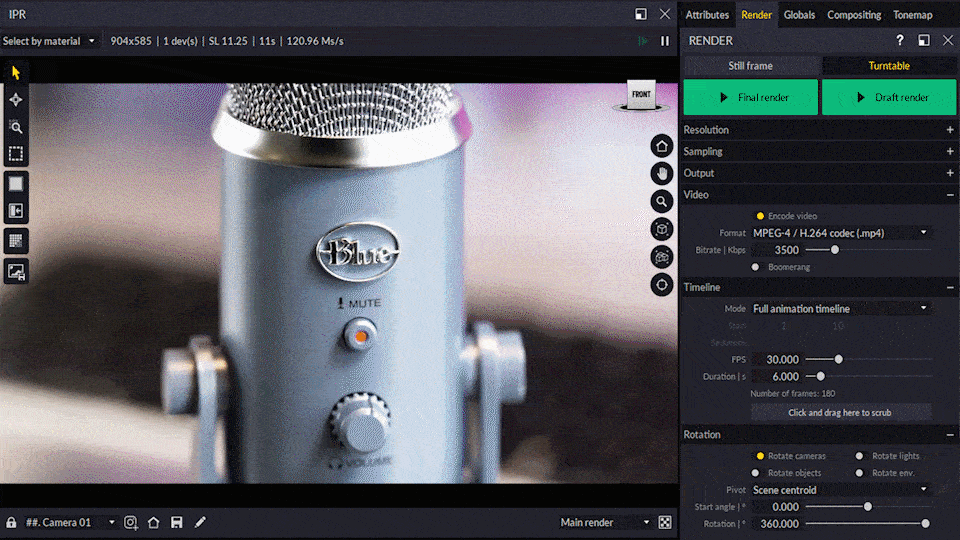
Turntable animations
Straightforward and easy to use, our turntable wizard allows you to create stunning presentations for your models and their material details. The animation can be previewed in real-time within Maverick's viewport, and with just a few settings you will get amazing presentations in no time.
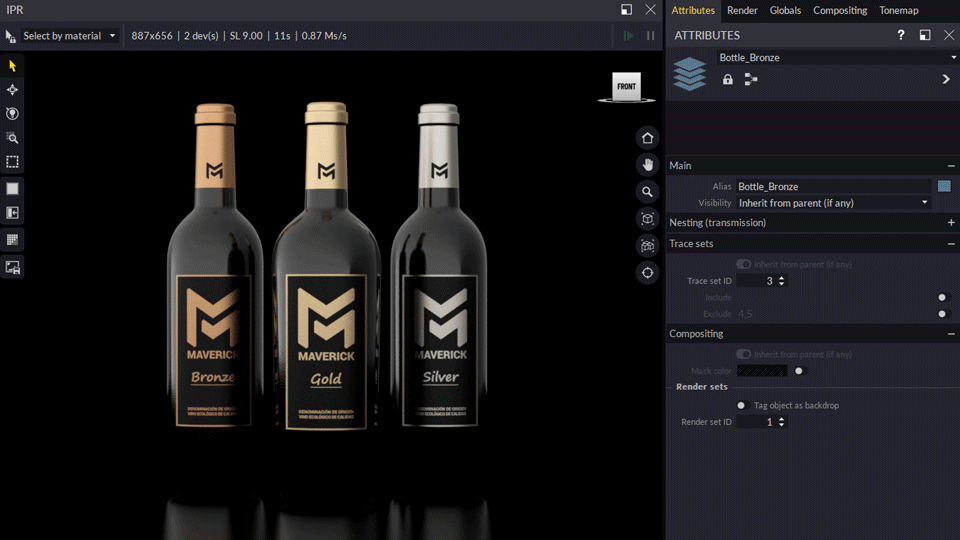
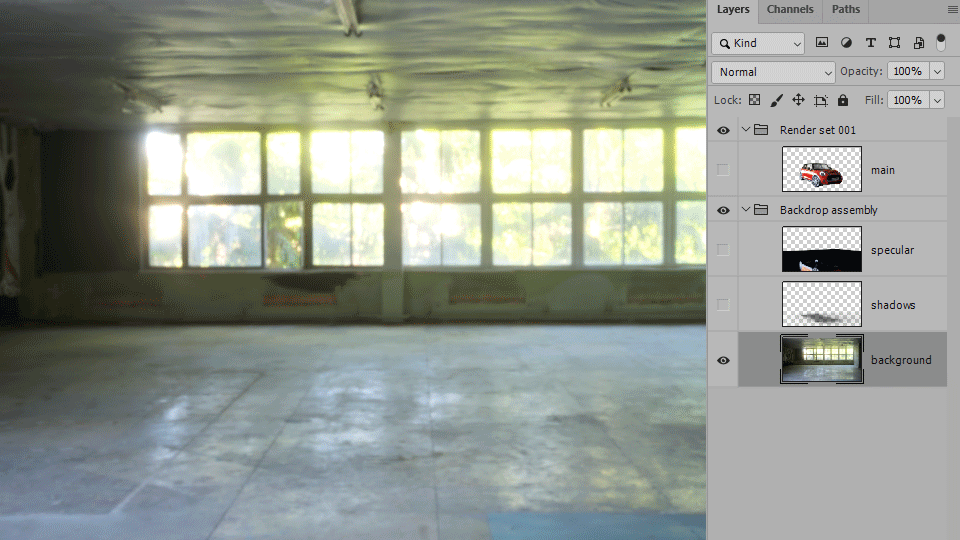
Render Sets
Detach your scene by groups of objects or materials and then render the whole scene at once to a PSD file conveniently organized in one layer per group for you to easily adjust each component separately in post-production.

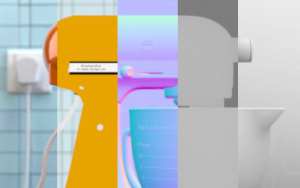
PSD and Backdrop
Rendering your objects with shadows and reflections detached into layers is a trivial task in Maverick. This feature, much sought after for product visualizers, is now just a couple of clicks away in Maverick.
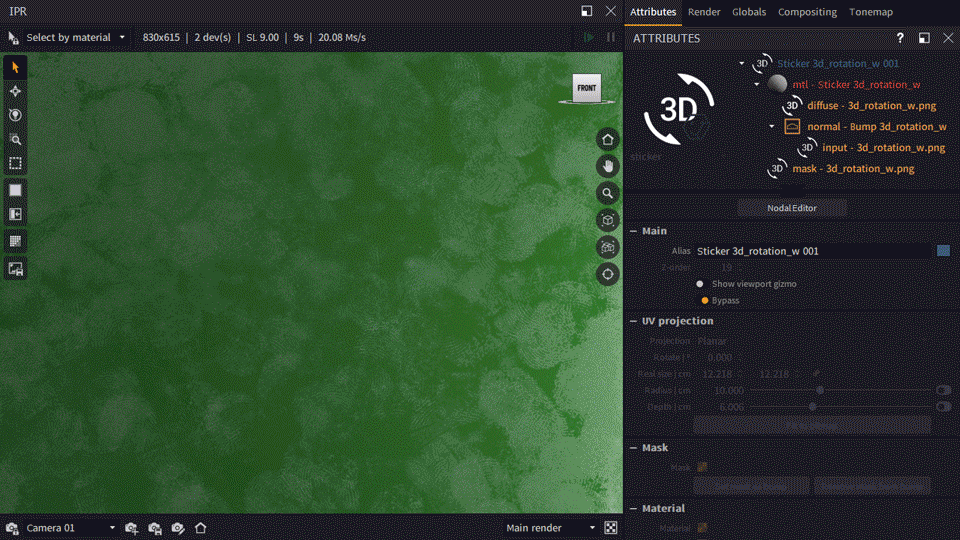
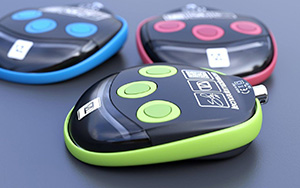
Stickers
Easily add stickers to your objects by simply dropping a transparent PNG image. You can add engraving details and configure the sticker properties in a very advanced way. From a basic symbol to hyper-realistic fingerprints.
Scatter
Use our advanced scatter tool to distribute objects across any surface. You can create interesting grounds for your products. From fiber, hair, or rock floors, to adding floating particles thanks to our rich library. The possibilities are endless.

Key Features
Physically-based
Completely physically-correct and accurate, Maverick ensures photo-real and plausible output
Spectral
Full spectral rendering reproduces rich stunning colors, faithful to optical nuances of materials

True Camera Optics
Maverick Render functions as a virtual camera capturing digital worlds realistically
Powerful Lights System
Fast and smooth soft shadows from customizable lights with common shapes and gradients
GPU-accelerated
Architectured to leverage CUDA-capable Nvidia GPU computing power
Interactive Path-Tracing
Maverick Studio responds interactively to changes with final, uncompromised quality
WYSIWYG
From beginning to end, the interactive render delivers final quality without compromise
Adaptive
Automatically leverages computing power favoring noisier image areas
AI Denoising
Uses Nvidia's Optix AI denoiser for faster final images or near-instantaneous previews
Tonemapping
Advanced and fully interactive tone-mapping controls for achieving desired aesthetics

File Importers
Supports STEP, IGES, 3DM, USD, GLTF, FBX and other common CAD/3D formats
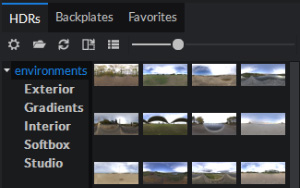
Lighting Library
Extensive library with stock HDRIs and matching backplates for scene illumination
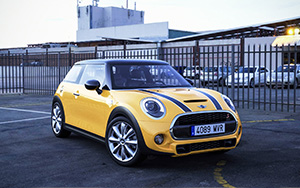
Image-Based Lighting
Quickest method to illuminate scenes with rich details from location photography

Physical Sky & Sun
Complete system featuring geo-positioning, astronomical, and custom orientation controls
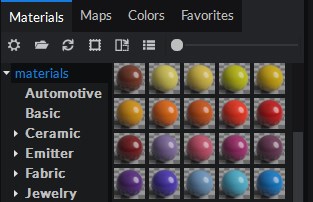
Shading Library
Over 1300 pre-made materials for simple drag-and-drop application to models
Materials
Extensive control with physics models for coatings, scattering, translucency, and more
Render Passes
Extensive pass list for advanced post-processing and compositing with multi-layer EXR support
Shadow Catcher
Automatic shadow catching from light sources with seamless backplate integration
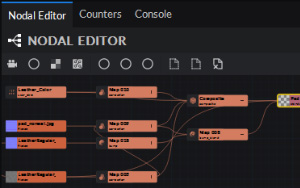
Nodal Material Graph
Visual nodal editor simplifying complex material creation
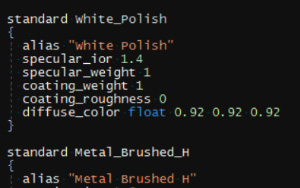
Text-based Scene Format
Human-readable .mks files enabling integration without custom coding